All Categories
Featured
Table of Contents
- – Class A Rv Custom Paint And Repair Garden Grove...
- – OCRV Center
- – Rv Painting Near Me Garden Grove, CA
- – Rv Painting Near Me Garden Grove, CA
- – Rv Paint Shops Near Me Garden Grove, CA
- – Motorhome Custom Paint Jobs Garden Grove, CA
- – Paint Fiberglass Rv Garden Grove, CA
- – Painting An Rv Garden Grove, CA
- – Paint Fiberglass Rv Garden Grove, CA
- – Custom Rv Paint Jobs Garden Grove, CA
- – Rv Painter Garden Grove, CA
- – Paint Rv Garden Grove, CA
- – Motorhome Custom Paint Garden Grove, CA
- – Painting Rv Walls Garden Grove, CA
- – Class A Rv Custom Paint And Repair Garden Gr...
- – OCRV Center
Class A Rv Custom Paint And Repair Garden Grove, CA
Primer is vital for guaranteeing that your paint will stick and last longer on the wall surfaces. Be certain to cover all edges and sides evenly with primer and permit it to completely dry completely before continuing onto the next step. Utilize a great guide like Gripper or Kilz Attachment. Apply 1-2 layers of primer on all the walls that you will certainly be using color.
When possible, attempt not to overlap areas as high as feasible; rather, utilize long strokes in one direction till you finish each wall surface section before moving onto an additional one. You might discover it helpful to divide each wall surface into areas while repainting to ensure that whatever looks also when done drying later on.
Rv Painting Near Me Garden Grove, CA
Once more, wait 24-48 hours, and as soon as the second layer is completely dry, make sure to gently sand and clean down in between the coats. Get excellent high quality paint. At the very least an eggshell or satin finish is recommended. Make use of a brush to enter the edges of the walls and make use of 3/8 nap rollers to use a lot of the paint.
Luckily, Happy Glamper Carbon monoxide is a professional in all points Do it yourself Recreational vehicle improvement and has many overviews to assist with your following project. Not prepared to place the Motor home valances back up? Love the appearance of shiplap yet not the price tag?
Try this do it yourself con artist shiplap wall in the interior of your recreational vehicle to provide it style without all the extra weight. Painting your recreational vehicle? Have a look at this detailed guide on how to repaint recreational vehicle cupboards and transform your RV by painting your RV cabinet doors! Update your motor home windows with these simple detailed guidelines on just how to make recreational vehicle do it yourself curtains that roll-up.
Rv Painting Near Me Garden Grove, CA
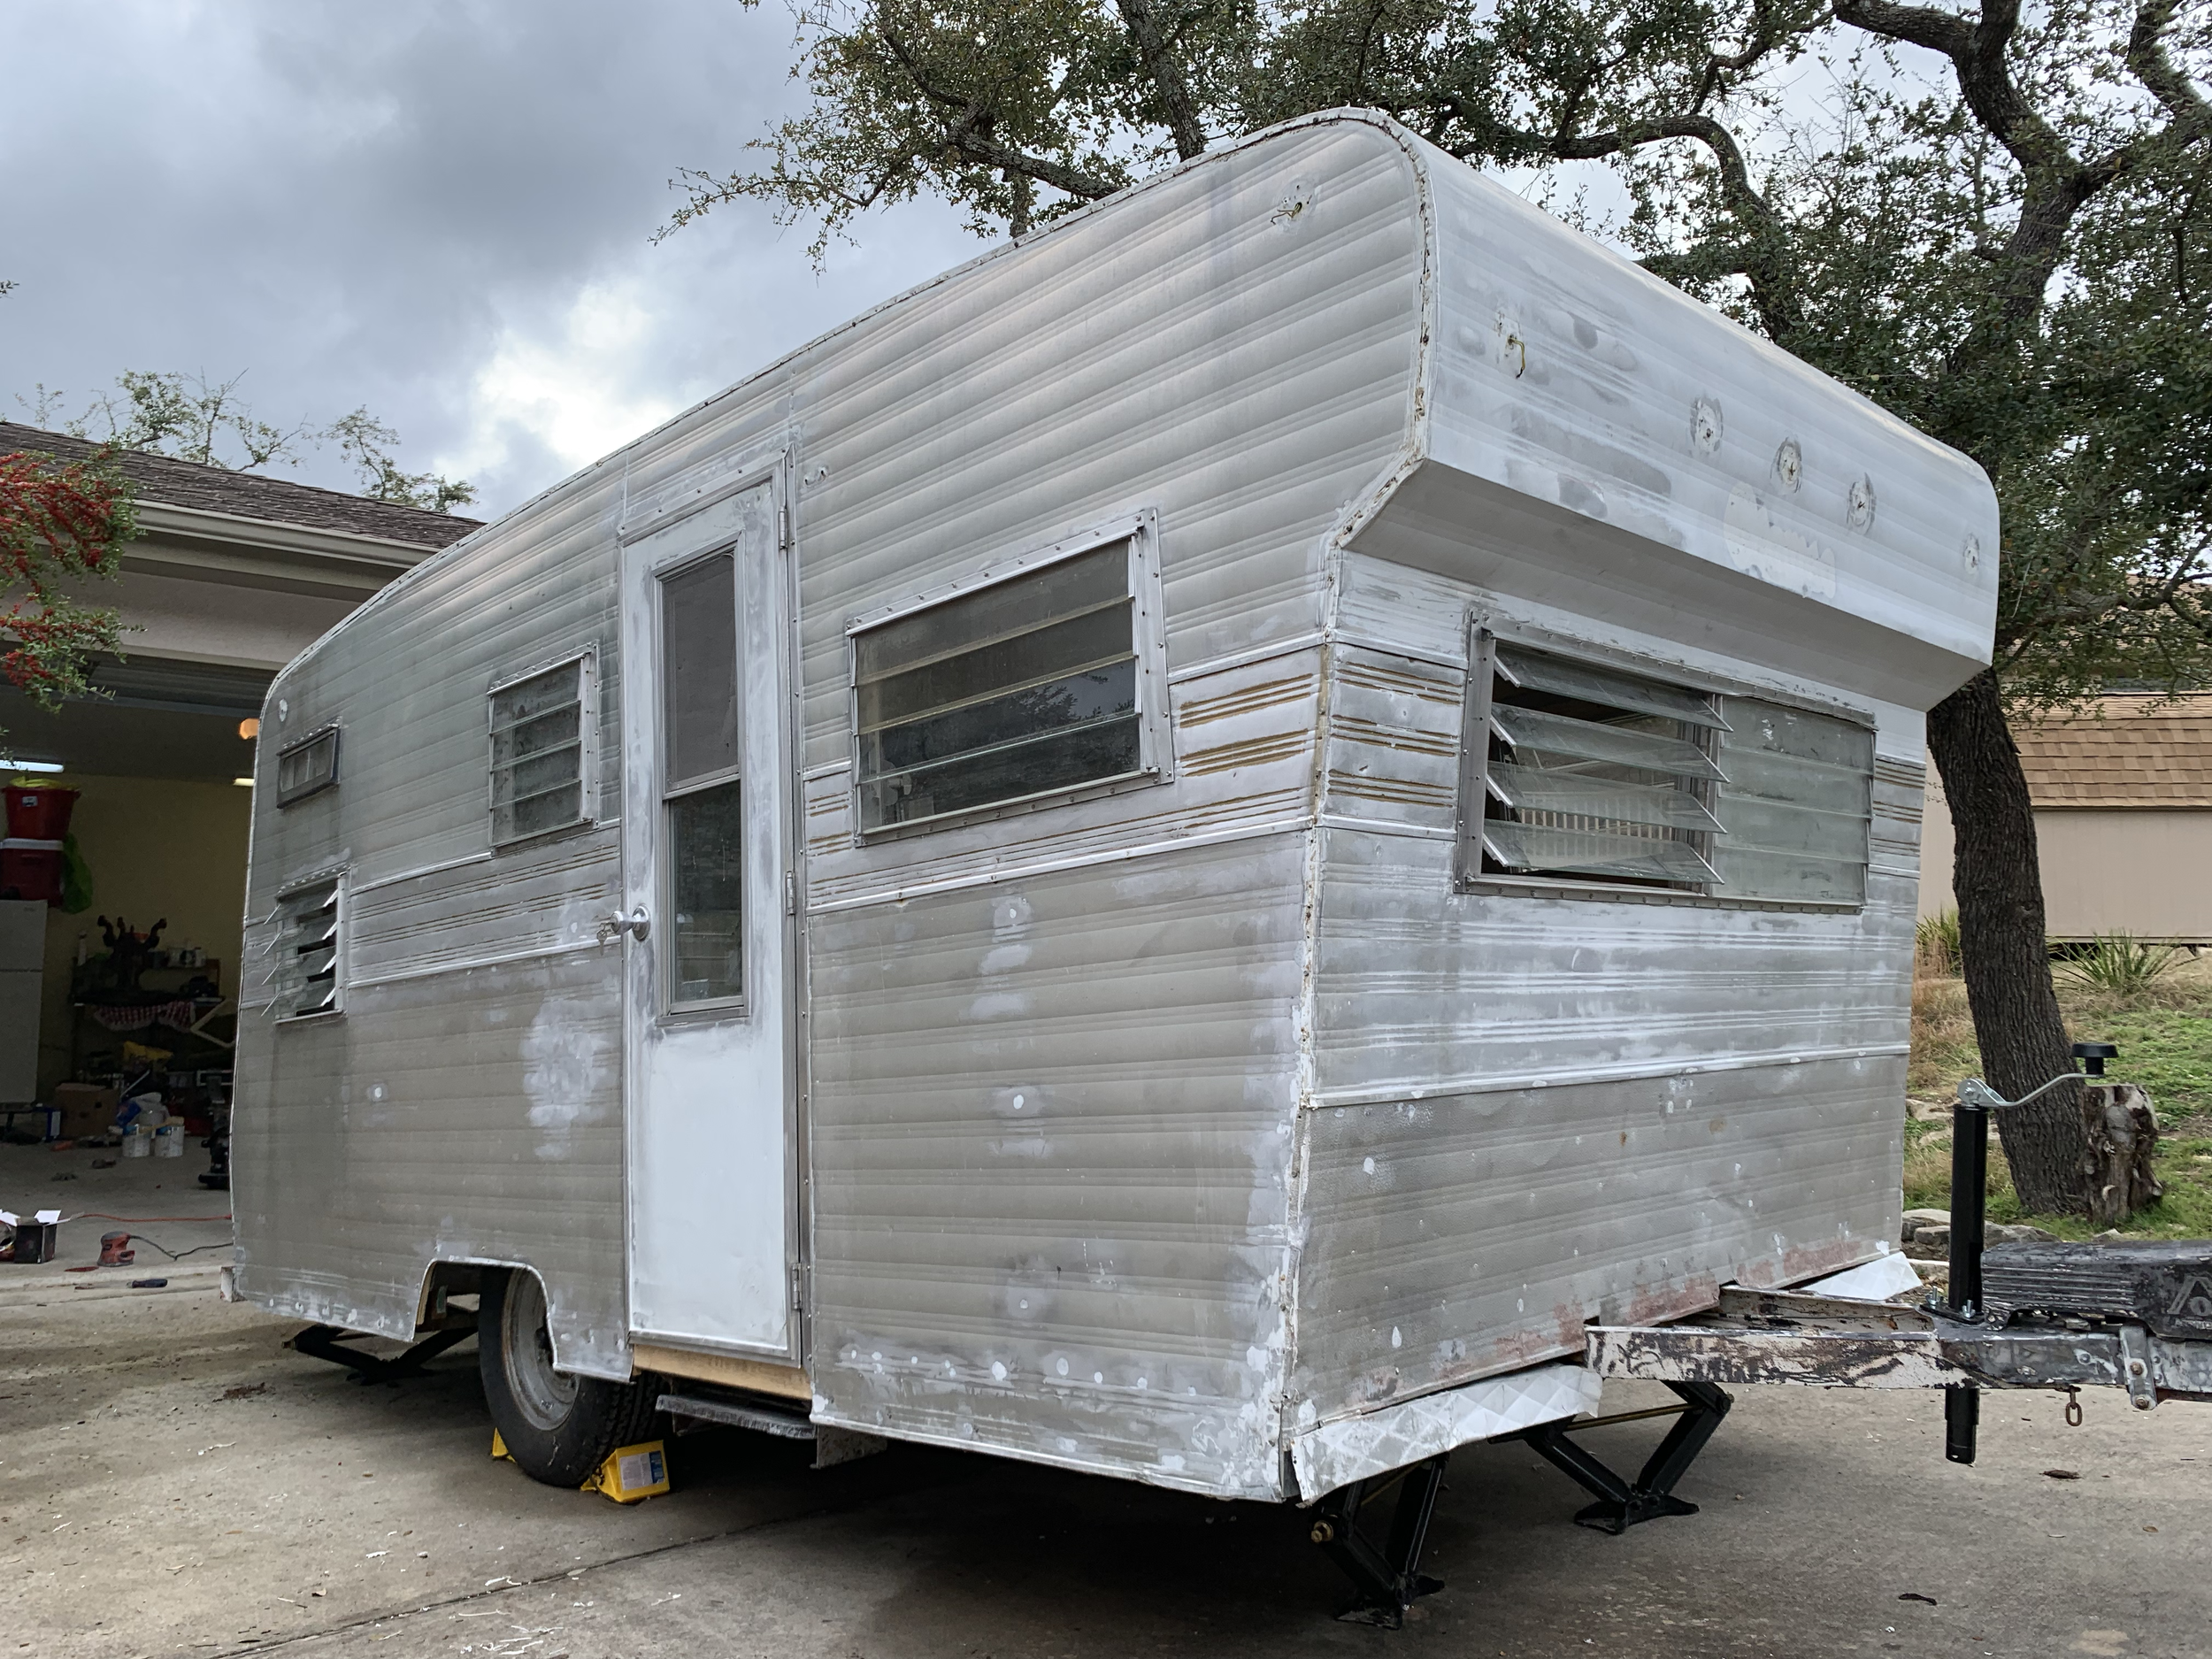
Painting your RV can take a breath new life into an older vehicle and provide it a fresh, updated look. Right here's just how to repaint your RV!
Begin by thoroughly washing the recreational vehicle to remove any dust, oil, or grime that could impact paint attachment. Make use of a gentle cleaning agent or RV-specific cleaner. Once the RV is clean, sand the whole surface area with medium-grit sandpaper to produce a slightly harsh texture that assists the primer bond. Pay additional attention to any areas with rust or existing paint chipsthese should be sanded down up until smooth.
Rv Paint Shops Near Me Garden Grove, CA
Apply an even layer of primer making use of a paint sprayer or roller. Work in sections to make certain complete protection and allow the primer to completely dry according to the supplier's guidelines. This might take several hours and even over night, depending upon the product. As soon as the primer is completely dry, inspect it for any type of locations that require touch-ups.
With the primer completely dry and smooth, it's time to apply the paint. Functioning in a well-ventilated area, apply the paint using long, even strokes with a sprayer or roller. Beginning from the top of the RV and function your way down, covering one side at once. If you're utilizing a sprayer, hold it regarding a foot away from the surface and move in constant passes, overlapping each pass somewhat for also coverage.
Apply the paint in slim layers to prevent drips, and allow each layer dry prior to using the next. A lot of Motor homes will require two or three layers for full insurance coverage. Permit appropriate drying time in between coats as suggested by the paint supplier. This will certainly aid avoid spotting and ensure a smooth, sturdy coating.
Motorhome Custom Paint Jobs Garden Grove, CA
A clear coat gives included defense and a glossy surface. When the final layer of paint is dry, apply a clear urethane topcoat to seal the paint and include a layer of security against the aspects. Make use of the exact same application technique just like the paint, functioning in even, overlapping strokes.
Enable the clear layer to heal totally, which might take 24 hours or even more, relying on weather and the product you utilize. When the clear layer is dry, get rid of all painter's tape and ground cloth thoroughly. Beware around the edges to avoid peeling off paint along with the tape.
Once the paint has healed completely, wash the motor home gently to get rid of any type of staying dirt or residue from the painting process. To keep your RV looking its ideal, wash it routinely with a mild cleaner and stay clear of unpleasant materials that can harm the paint. Waxing the exterior a few times a year can help keep the paint's shine and provide added defense.
Painting your recreational vehicle can transform its appearance and safeguard it from the wear and tear of the roadway. With appropriate preparation and patience, you can attain a professional-looking coating that makes your RV appearance terrific and secures it for a lot more journeys to come. Whether striking the open roadway or setting up camp, a fresh coat of paint will certainly make your motor home really feel like brand-new once again.
Paint Fiberglass Rv Garden Grove, CA
The kind of motor home exterior upgrade needed will depend on factors like the recreational vehicle's type and dimension, the degree of any kind of damages, and the condition of the stickers. Right here are some essential considerations to evaluate prior to starting the project: Motorhome Recreational vehicles are classified into three major classes: A, B, and C.
The area, products, and architectural information of your recreational vehicle will figure out the intricacy of the job. Faded or fractured decals and graphics are clear indications that substitutes are required. Upgrading old stickers with fresh ones can substantially invigorate the appearance of your motor home and give it a new feeling.
If the paint looks faded, shows indicators of corrosion, or merely no longer charms to you, consider a fresh coat of paint. Once you understand what your Motor home requires, you have to make a decision whether it requires DIY restoration work or it's something you can leave to the pros.
For the finest results, take into consideration making use of a power washing machine to guarantee a deep clean. Once the surface area is tidy and completely dry, use a top notch wax to restore the paint's radiance and safeguard it from the aspects.
Painting An Rv Garden Grove, CA
While Do it yourself can in some cases conserve money, it may not be the best strategy for intricate Motor home makeovers. Specialists like Leisure Coachworks have the know-how to transform your RV's exterior with a full transformation.
Utilizing top-tier tools like innovative paint sprayers, our professionals attain a smooth, flawless exterior that will certainly stand the test of time. When it concerns changing your RV stickers, you have two options: You can get initial RV decals from suppliers that focus on recreational vehicle parts supply. Consider going to Leisure recreational vehicle parts to aid you locate high quality and original components that will give your RV a makeover and serve you for many years.
Paint Fiberglass Rv Garden Grove, CA
This web site uses cookies to boost your experience while you browse through the site. Rv Paint Job Garden Grove. Out of these, the cookies that are classified as needed are stored on your internet browser as they are necessary for the working of standard functionalities of the site. We also make use of third-party cookies that help us assess and recognize exactly how you utilize this web site
You additionally have the choice to opt-out of these cookies. Opting out of some of these cookies may impact your surfing experience.
It's an olden concern. Do you take your motor home to a personalized paint shop or opt for a DO IT YOURSELF recreational vehicle paint work? As a RV owner, it's a question that you eventually need to encounter when your RV's exterior starts to wear. There's no right or wrong answer when it concerns picking a specialist RV paint task or going the do it yourself paint route.
Custom Rv Paint Jobs Garden Grove, CA
One of the most likely reason a person chooses to go do it yourself is due to the expense factor. Relying on the size and design, the typical recreational vehicle paint work can vary from $5,000-$15,000+. Repainting a motor home on your very own, nevertheless, can be as inexpensive as $300 if you agree to spend the moment and effort.

If you can save the effort, you can do the labor on your own and save cash at the same time. With help from the net, you can discover to accomplish anything. There's a wealth of knowledge to assist you detailed via the procedure of paint your recreational vehicle. You can pull up a composed guide on your phone (or print them out) or you can follow along with a YouTube video.
Rv Painter Garden Grove, CA
While it may appear daunting to filter with, with perseverance and decision, you can utilize these resources to help you change your recreational vehicle exterior. When you decide to repaint your motorhome by yourself, you have overall control over what happens. You choose what sort of paint and materials are used.

There's also a feeling of achievement that comes with taking on a big Do it yourself project. You can not beat the sensation of standing back and really feeling satisfaction in the hard job you've put in.
When you most likely to a personalized paint store, there's an assumption in the high quality of the end product. That assumption originates from the experience and sources that a paint shop has to use. Custom-made paint shops feature staff members that are trained in a process that's been done plenty of times. That procedure has actually been pin down right into a reliable regimen for the shop employees.
Paint Rv Garden Grove, CA
If you aren't the imaginative type, a Motor home paint store will have lots of durable styles and colors to pick from. They'll function with you to obtain the best appearance out of your RV.
While Do it yourself is a cost-saving procedure, it will take up a good portion of time to total paint your Recreational vehicle. Those that work permanent may discover it difficult to discover the totally free time outside of the weekend to undertake repainting their mobile home.
Motorhome Custom Paint Garden Grove, CA
Inevitably, the decision is yours on how to take care of your Motor home. If you determine to get your paint done skillfully and are looking for a costs, high-grade service, check out CDI Custom Paint today and obtain a quote.
A great deal of things have actually happened to, in, around this front edge. And as a result, it does not look that great anymore. There's areas where the paint is simply plain gone. So if we most likely to touch this up, we're up against a pair points. This is white, but is it what kind of white? Can I just go and obtain a can of aerosol paint from an equipment shop and spray that? Most likely not.
And if this camper lived outdoors, it's obtained climate and sun and all type of things taking place. So right here is this crazy amazing point. The insane trendy thing is places that do a whole lot of vehicle body work, as you might picture, are frequently attempting to match existing and older paint.
Painting Rv Walls Garden Grove, CA
You take a piece of something. You go to a home. They put the piece of something in a scanner, and they match that shade. Now, the difference is when you discover the appropriate spot, you call 'em, and they put a scanner on the camper. At a vehicle body area, they would certainly be placing it on a car, and they do the same point.
The way that this functioned for me was made a phone call, and it was an automobile body area that referred me to a paint store. A service individual from the paint shop involved the camper, and they put the scanner exactly on the device. And I was seeking scans of the white, and after that there's type of a blue and a teal, and I wanted paint so I could touch all of those up.
We can match heaven to a 7," or whatever. So they can give you a read ahead of time on just how excellent a shade match they think they're gon na be able to attend to you. From there, at the particular area I use, they had the ability to give me with rattle containers, aerosol container that are in the shades I'm utilizing.
Class A Rv Custom Paint And Repair Garden Grove, CA
Next thing for me, I'm gon na mask this off and this and this so we don't obtain repaint where we do not desire it. And after that come back with the white and begin loading in these negative areas.
Got home windows open up at that end. So I've obtained a great deal of air relocating via below. You wan na make certain that you have actually, actually great air flow. And if you require to use a mask, I really have a wind in my face right currently, so I'm gon na be able to forego the mask.
And just prior to placing the concealing tape on, cleaning everything down with warm soapy water is gon na obtain the residue off of there so that the paint has every possibility to stick. Now, as I spray, one of the points to view for is on the areas actually close to the edge, we need a fair little bit of product there to make certain we obtain this covered.
It's really best up here that it looks the grossest. As I function away from that edge, I'm gon na feather it a little bit by relocating away from the camper and then likewise perhaps not holding the button down, but simply kinda giving a burst of paint, a little short ruptured of paint rather of a complete.
Rv Painting Near Me Garden Grove, CAClass A Rv Custom Paint And Repair Garden Grove, CA
Rv Exterior Paint Garden Grove, CA
Paint Fiberglass Rv Garden Grove, CA
Painting Fiberglass Motorhome Garden Grove, CA
Rv Paint And Body Shops Near Me Garden Grove, CA
Rv Painting Near Me Garden Grove, CA
Rv Painting Garden Grove, CA
Rv Paint Repair Garden Grove, CA
Rv Paint Garden Grove, CA
Custom Motorhome Paint Jobs Garden Grove, CA
Custom Rv Paint Jobs Garden Grove, CA
Painting Rv Exterior Garden Grove, CA
Painting Fiberglass Motorhome Garden Grove, CA
Rv Exterior Paint Garden Grove, CA
Custom Rv Paint Jobs Garden Grove, CA
Custom Rv Paint Garden Grove, CA
Custom Rv Paint Garden Grove, CA
Rv Paint And Repair Garden Grove, CA
Motorhome Custom Paint Jobs Garden Grove, CA
Rv Exterior Paint Garden Grove, CA
Rv Exterior Paint Garden Grove, CA
Painting Rv Exterior Garden Grove, CA
Rv Paint Shop Near Me Garden Grove, CA
Class A Rv Custom Paint And Repair Garden Grove, CA
Painting Rv Walls Garden Grove, CA
Rv Exterior Paint Garden Grove, CA
Custom Rv Paint Garden Grove, CA
Custom Rv Paint Jobs Garden Grove, CA
Rv Exterior Paint Garden Grove, CA
Paint Rv Garden Grove, CA
Paint Motorhome Exterior Garden Grove, CA
Motorhome Painting Garden Grove, CA
Rv Paint Shops Near Me Garden Grove, CA
Motorhome Paint Repair Garden Grove, CA
Motorhome Paint Shops Garden Grove, CA
Custom Painted Motorhomes Garden Grove, CA
Rv Painter Garden Grove, CA
Custom Motorhome Paint Jobs Garden Grove, CA
Motorhome Paint Repair Garden Grove, CA
Motorhome Painting Near Me Garden Grove, CA
Paint Motorhome Exterior Garden Grove, CA
Painting An Rv Garden Grove, CA
Rv Painting Garden Grove, CA
Motorhome Custom Paint Jobs Garden Grove, CA
Motorhome Paint Shops Garden Grove, CA
Rv Painter Garden Grove, CA
Painting An Rv Garden Grove, CA
Rv Paint And Body Shops Near Me Garden Grove, CA
Rv Paint Shops Near Me Garden Grove, CA
Rv Paint Garden Grove, CA
Rv Exterior Paint Garden Grove, CA
Paint Fiberglass Rv Garden Grove, CA
Painting An Rv Garden Grove, CA
Rv Paint And Body Shops Near Me Garden Grove, CA
Painting An Rv Garden Grove, CA
Rv Exterior Paint Garden Grove, CA
Painting Rv Garden Grove, CA
Rv Painting Garden Grove, CA
Custom Painted Motorhomes Garden Grove, CA
Motorhome Custom Paint Jobs Garden Grove, CA
Rv Paint And Repair Garden Grove, CA
Rv Paint Garden Grove, CA
Painting Rv Garden Grove, CA
Painting Rv Exterior Garden Grove, CA
Rv Paint And Repair Garden Grove, CA
Motorhome Painting Near Me Garden Grove, CA
Painting Rv Walls Garden Grove, CA
Rv Paint Repair Garden Grove, CA
Rv Painting Garden Grove, CA
Motorhome Custom Paint Jobs Garden Grove, CA
Rv Paint Repair Garden Grove, CA
Painting Rv Walls Garden Grove, CA
Painting An Rv Garden Grove, CA
Painting Rv Walls Garden Grove, CA
Rv Paint And Body Shops Near Me Garden Grove, CA
Class A Rv Custom Paint And Repair Garden Grove, CA
Motorhome Paint Shops Garden Grove, CA
Near My Location Seo Marketing Company Garden Grove, CA
In My Area Seo Company Near Me Garden Grove, CA
OCRV Center
Table of Contents
- – Class A Rv Custom Paint And Repair Garden Grove...
- – OCRV Center
- – Rv Painting Near Me Garden Grove, CA
- – Rv Painting Near Me Garden Grove, CA
- – Rv Paint Shops Near Me Garden Grove, CA
- – Motorhome Custom Paint Jobs Garden Grove, CA
- – Paint Fiberglass Rv Garden Grove, CA
- – Painting An Rv Garden Grove, CA
- – Paint Fiberglass Rv Garden Grove, CA
- – Custom Rv Paint Jobs Garden Grove, CA
- – Rv Painter Garden Grove, CA
- – Paint Rv Garden Grove, CA
- – Motorhome Custom Paint Garden Grove, CA
- – Painting Rv Walls Garden Grove, CA
- – Class A Rv Custom Paint And Repair Garden Gr...
- – OCRV Center
Latest Posts
Rv Rubber Roof Replacement Rowland Heights
Rv Carpet Installation Orange
Rv Refrigeration Repair Montclair
More
Latest Posts
Rv Rubber Roof Replacement Rowland Heights
Rv Carpet Installation Orange
Rv Refrigeration Repair Montclair