All Categories
Featured
Table of Contents
- – Rv Trailer Rubber Roof Repair Mira Loma, CA
- – OCRV Center
- – Motorhome Roof Replacement Mira Loma, CA
- – Roof Repair For Rv Mira Loma, CA
- – Rv Roof Leak Repair Mira Loma, CA
- – Rv Roof Repair Service Near Me Mira Loma, CA
- – Rubber Roofing For Campers Mira Loma, CA
- – Rv Rubber Roof Repair Mira Loma, CA
- – Rubber Roof For Rv Mira Loma, CA
- – Rv Roof Leak Repair Mira Loma, CA
- – Epdm Rv Roof Repair Mira Loma, CA
- – Rubber Roof For Rv Mira Loma, CA
- – Resealing Rv Roof Mira Loma, CA
- – Class C Rv Roof Repair Mira Loma, CA
- – OCRV Center
Rv Trailer Rubber Roof Repair Mira Loma, CA
I figured I prefer to have it semi-portable so I selected the cover, plus this allows me to adjust the elevation up and down when I require to. Naturally the most affordable option of all would be to simply throw an excellent tarp over the top of your RV for stormy days and just work with sunny days! Initially I increased the legs with 1 1/2 PVC pipeline that fit inside the legs and after that I affixed a hose pipe clamp around the PVC pipeline to stand up the cover legs.
This is still a little drooping. I most likely need to have forked out for some stiff steel pipe from the begin.
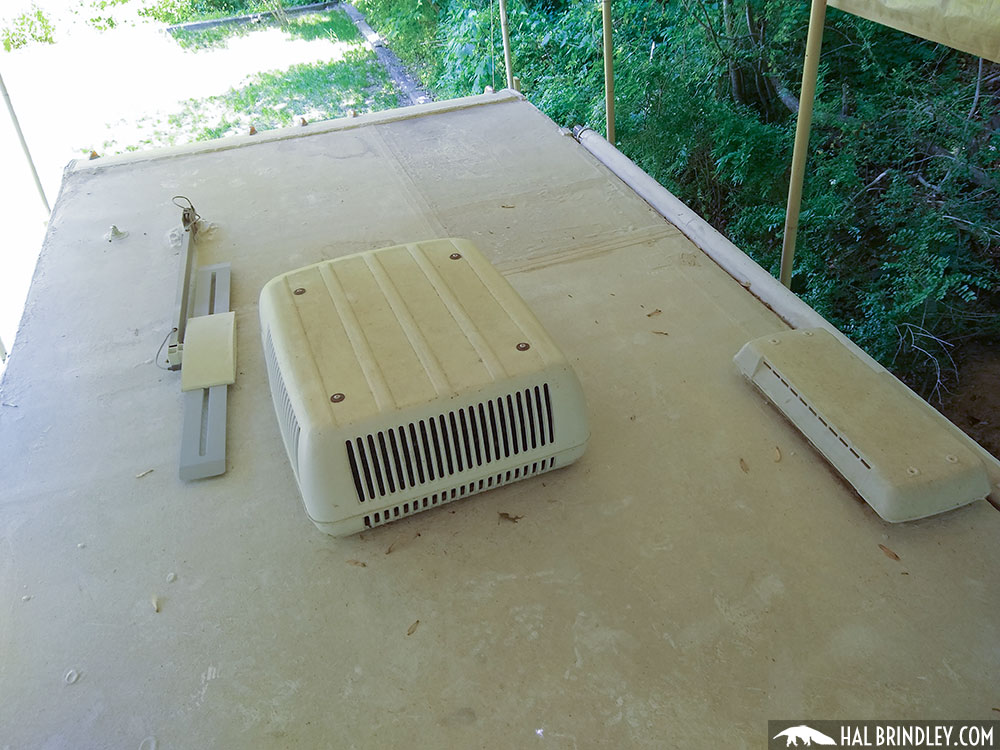
An old patch job on the Recreational vehicle rubber roof. As you can see, this roofing system has actually had a great deal of issues over the years.
On the base is the initial EPDM rubber roofing layer. I recognize it's EPDM rubber and not TPO rubber since of the black backing. On top of my EPDM roof covering is a slim Motor home roof covering finish that was applied later on.
Motorhome Roof Replacement Mira Loma, CA
I simply left the roof covering layer adhered to the EPDM roof covering and drew them up with each other. (You do not require to peel them up individually.) Beginning to peel roof layer. Peeling up area of the bottom layer of rubber. This reveals that the original motor home roofing was EPDM as a result of the black support.
I reduced lines with an utility blade around components. All rubber roofing removed from camper. This step went rather rapidly. There was a glue under the bottom layer of rubber that was still rather well embeded numerous areas, however with a good little force it peeled up easily.
If you believe you'll be conserving the roofing system outdoor decking plywood (not replacing it), then you might conserve yourself some cleaning trouble by getting rid of the components initially and afterwards peeling off up the rubber! Information of water damages on camper roof. Much more water damaged locations on recreational vehicle roofing system decking. There was absolutely nothing actually awful that made me seem like I was going to fall with, but certainly a great deal of damage and I was obtaining the sensation I would certainly be changing a great deal of the roofing system decking plywood.
Roof Repair For Rv Mira Loma, CA
I went for the most basic one initially, an air vent cap from a kitchen sink pipes air vent pipe. There is no other way around this, you simply have to start digging until you reveal the screw heads.
Loosening the screws in air vent cap. The screws on this air vent cap were hex-head steel screws so I utilized a little socket motorist to remove them. Some appeared tidy. Others were rusted and I had to utilize a vice-grip pliers to order the heads and turn them bit by bit.
I discovered an old wasp nest inside the vent cover. This is a view I'll possibly have to obtain utilized to, locating the remains of pet habitation high and low. I invest a terrible great deal of my time creating excellent wildlife environment in my lawn so I don't get angered when an animal selects to set up home in my recreational vehicle.
Rv Roof Leak Repair Mira Loma, CA
Thankfully no one was home in this old nest so I simply tossed it. You should attempt not to damage these pieces (like air vent covers and caps) as you're scratching off the old caulk and sealant simply in instance you need to use them once again.
One down, 7 more fixtures to go. Next I determined to deal with the only roof covering air flow fan that my camper has. My roof covering air vent also had an air vent cover over it. So I began scuffing the crud from those screws. Beginning on the roofing system air vent. Hardware subjected on roofing air vent cap, the first nut came off clean.
The fasteners on this RV roofing vent cover were nuts on little bolts. The 2nd one simply started rotating, meaning the screw was not fixed in location but turning along with the nut. A peek at the hardware holding down the roof covering air vent cover.
Rv Roof Repair Service Near Me Mira Loma, CA
I didn't have any kind of great way to hold the bolt in position so instead I decided to saw via the screws with a reciprocating saw. Sawing through screws on roof air vent cover. I utilized a cordless reciprocating saw with a metal-cutting blade yet it was challenging to get the blade flat enough to get to the screws so near the roofing system deck.
Bending the blade a little bit to reach close to the roof deck. Cover gotten rid of from roof covering vent.
A lot of were so old and rusted that they sheared off when I loosened after that with a lot of pressure. Unscrewing the brackets that held the air vent cover in place. After that I scuffed more caulk and roof covering sealant off the flange of the roofing vent itself. I soon uncovered there were no much more screws or equipment holding it down so I surrendered on the scuffing and went inside the motor home After scratching the caulk and sealer from flange of roof vent, say goodbye to screws! Unscrewing the inside cover plate of roof vent follower in RV washroom.
Rubber Roofing For Campers Mira Loma, CA
A pair sheared off with a whole lot of force, but 2 wouldn't move. So I needed to drill out the screw heads. I chose a drill bit near the dimension of the shaft of the screws that I had already taken out and started exploration. Selecting a drill bit for drilling out a screw head.
Security glasses suggested. So I pierced out the heads, one stood out off and the other I was getting frustrated with and gave it a pull prior to it was drilled through. Instead of standing out off the screw head, the plastic simply thawed away around the hot screw head. Whoops. Hope I don't need to recycle this cover.
All corner brackets got rid of, ready to draw out. As soon as the braces were out I went back up top to tear out the the roofing system vent. I scuffed up all the staying cruds and rubber roof. Raising off the old roof vent. There are 2 wires running to the roof covering vent (a black warm cable and a white neutral cable) that you'll require to clip to get rid of the old air vent.
Rv Rubber Roof Repair Mira Loma, CA
These are the cords linking the roofing system venting follower. I clipped them simply above heaven splice joints. Roof covering vent removed and tidied up. After clipping the wire and eliminating the air vent, I cleansed up any staying goop and obtained my very first excellent check out the roof frame. It's steel! 1 1/2 inches thick.
Some Recreational vehicle roofing systems are framed with wood, others have steel framing. I scuffed off some corrosion and made a huge mess inside the restroom.
Oops. Possibly I must have put a tarp down. My final objective of the day was to obtain the refrigerator air vent cover off. I discovered motor home sealant blobs at four points on the cover so assumed there have to be screws under them. I tore them up and located Phillips screw heads.
Subjecting the screws in the refrigerator vent cap. Peeling old RV roof covering finish on top of refrigerator air vent cap I also observed that there was a coat of motor home roofing finishing over the air vent cap. These finishings are painted on with a brush so clearly whoever did this finish just blobbed in on top of whatever.
Rubber Roof For Rv Mira Loma, CA
Taking off the cover of the fridge roofing vent. Once the cap is off it's more of the same. Removing extra rubber and removing recreational vehicle roofing system sealer and old caulk. Get comfortable since this sucker has 32 screws in it! Ugh. Scuffing lap sealer and caulk from screw heads.
Tearing off the refrigerator roof covering air vent after all screws are eliminated. Nearly every screw was in excellent enough condition to eliminate with an outlet driver, yet a couple were also rusty and needed to be twisted out with vice hold pliers.
Rv Roof Leak Repair Mira Loma, CA
I peeled off the staying rubber roofing from under the flange and after that removed the old putty underneath. I'll clean it far better if and when I decide to reuse it. Looks like it's in decent shape so I possibly will. Scraping off the old putty from the flange of the fridge roof air vent.
That's as for I jumped on day 1 after regarding 5 hours of lazy work. Not a bad start. I additionally observed this incredible scum mold growing in the compost under the camper. If you have actually never ever seen a scum mold and mildew, have a look at a long time gaps of them growing! They are freaking impressive! A sludge mold and mildew under the camper! Currently proceed to step 2 when I remove the remainder of the roofing system components!.
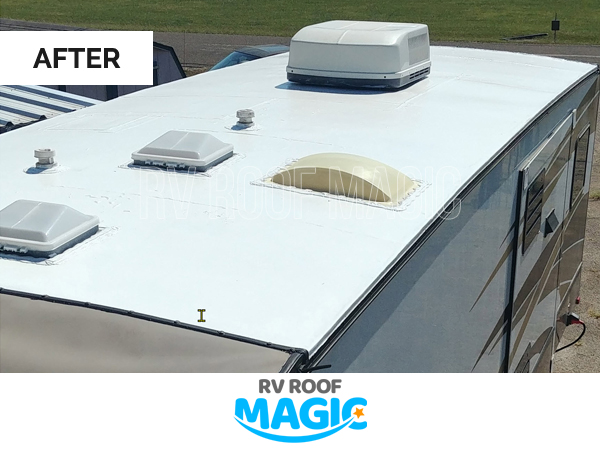
?.!!. When it concerns motor home roof covering replacement, there are numerous elements to take into consideration. Over time, your motor home's roof covering can become used, damaged, or create leakages, which can endanger its honesty and lead to even more substantial problems. If you're experiencing any one of these issues, it may be time to consider replacing your motor home roofing.
There are several signs that suggest your motor home calls for a roofing system replacement. These signs include water leakages, sagging or soft spots on the roof covering, cracks or divides in the roofing product, excessive deterioration, and noticeable sunshine coming through the roofing system. If you notice any of these signs, it is important to address them immediately to avoid additional damages to your motor home.
Epdm Rv Roof Repair Mira Loma, CA
On average, RV roofing system replacement expenses can range from $2,000 to $10,000. When picking a RV roof product, several variables come into play.
Choosing between a do-it-yourself (DO IT YOURSELF) method or specialist installation for your recreational vehicle roof substitute relies on your abilities, experience, and readily available time. While do it yourself installation can save you money, it requires appropriate understanding and expertise to make sure an appropriate and water tight installment. On the other hand, specialist installation offers the benefit of knowledge, experience, and guarantees.
Examine and clean up the rain gutters and downspouts to guarantee proper drain and protect against water pooling on the roofing. Apply a safety layer or sealant to the roof covering surface as suggested by the maker. This can provide added UV security and aid expand the life of the roofing system. Avoid walking on the roof unless necessary.
The price of setting up a recreational vehicle roof can vary based on elements like motor home size, chosen roof covering product, and whether specialist installation is requested. On standard, you can expect to spend in between $2,000 and $10,000 for a motor home roof covering replacement. Yes, the roof of a RV can be replaced. If your RV's roofing is damaged, used out, or leaking, a roofing replacement is often essential to ensure the structural stability of your motor home.
Rubber Roof For Rv Mira Loma, CA
Repairing a rip in a recreational vehicle roof covering relies on the severity and kind of roof covering material. For minor rips, you can use roof fixing tape or sealant particularly made for motor home roofings. Bigger splits may call for patching with a suitable roof material or looking for professional support. RV roofing system finishings can provide additional defense and extend the lifespan of your roof.
Spending in a top notch motor home roof covering can be worth it for lasting roofing system maintenance. Flex Seal products are often utilized as short-term or quick-fix solutions for tiny leakages or cracks. While they may offer a short-lived service, it's advised to talk to a professional and use correct recreational vehicle roof covering repair work products for an extra long-term and trustworthy solution.
Resealing Rv Roof Mira Loma, CA
PVC roofing systems supply excellent toughness, resistance to UV rays, and low upkeep requirements. They are considered a trustworthy alternative for Recreational vehicle roofings, however the ideal option depends on your particular demands and choices.
Resealing your recreational vehicle roof need to be done consistently to preserve its integrity and stop leaks. As a basic guideline, it's advised to reseal your recreational vehicle roofing system at the very least yearly or based on the producer's referrals. Whether to leave your recreational vehicle slides in or out depends on the scenario and individual choice.
Consider variables such as safety, weather problems, and ease when deciding. RV roofing leakages are fairly common due to different factors such as age, damage, improper maintenance, or extreme weather. Routine assessments and proactive maintenance can assist lessen the occurrence of leakages. The choice to amount to a motor home because of water damages depends upon the extent of the damage and the insurance firm's evaluation.
Class C Rv Roof Repair Mira Loma, CA
Insurance policy insurance coverage for motor home delamination relies on the particular plan and the reason of delamination. It is very important to assess your insurance coverage and speak with your company to recognize the coverage for delamination and any kind of appropriate deductibles. Claiming water damage on a camper depends on your insurance policy and the circumstances surrounding the water damages.
Rubber Roof For Camper Mira Loma, CAEpdm Rv Roof Repair Mira Loma, CA
Class C Rv Roof Repair Mira Loma, CA
Roof Repair For Rv Mira Loma, CA
Roof Repair For Rv Mira Loma, CA
Repair Rv Roof Leak Mira Loma, CA
Resealing Rv Roof Mira Loma, CA
Rv Fiberglass Roof Repair Mira Loma, CA
Replace Rv Roof Mira Loma, CA
Rv Rubber Roof Replacement Cost Mira Loma, CA
Rubber Roofing For Rv Mira Loma, CA
Rv Roof Repair Mira Loma, CA
Rubber Roofing For Rv Mira Loma, CA
Epdm Rv Roof Repair Mira Loma, CA
Rv Slide Out Roof Repair Mira Loma, CA
Rv Rubber Roof Repair Mira Loma, CA
Rv Roof Repair Fiberglass Mira Loma, CA
Rv Roof Repair Mira Loma, CA
Rv Roof Maintenance Mira Loma, CA
Rubber Roofing For Rv Mira Loma, CA
Rv Rubber Roof Replacement Cost Mira Loma, CA
Rv Trailer Rubber Roof Repair Mira Loma, CA
Rv Roof Leak Repair Near Me Mira Loma, CA
Rv Fiberglass Roof Repair Mira Loma, CA
Rv Rubber Roof Repair Mira Loma, CA
Repair Rv Roof Leak Mira Loma, CA
Repair Rv Roof Mira Loma, CA
Rv Fiberglass Roof Repair Mira Loma, CA
Rubber Roof For Camper Mira Loma, CA
Rv Roof Repair Mira Loma, CA
Rv Fiberglass Roof Repair Mira Loma, CA
Rv Rubber Roof Maintenance Mira Loma, CA
Rv Roof Replacement Mira Loma, CA
Rv Rubber Roof Repair Mira Loma, CA
Rv Roof Repair Service Near Me Mira Loma, CA
Motorhome Roof Replacement Mira Loma, CA
Rubber Roof For Camper Mira Loma, CA
Rv Trailer Rubber Roof Repair Mira Loma, CA
Rv Roof Leak Repair Near Me Mira Loma, CA
Replace Rv Roof Mira Loma, CA
Rv Roof Repair Fiberglass Mira Loma, CA
Epdm Rv Roof Repair Mira Loma, CA
Rubber Roof Installation Mira Loma, CA
Motorhome Roof Replacement Mira Loma, CA
Repair Rv Roof Leak Mira Loma, CA
Rubber Roof For Rv Mira Loma, CA
Rv Fiberglass Roof Repair Mira Loma, CA
Rv Fiberglass Roof Repair Mira Loma, CA
Rv Trailer Roof Repair Mira Loma, CA
Rv Trailer Rubber Roof Repair Mira Loma, CA
Rv Rubber Roof Replacement Cost Mira Loma, CA
Rv Rubber Roof Repair Mira Loma, CA
Rv Rubber Roof Maintenance Mira Loma, CA
Rv Roof Repair Fiberglass Mira Loma, CA
Best Rv Roof Repair Mira Loma, CA
Rubber Roof Installation Mira Loma, CA
Rv Trailer Roof Repair Mira Loma, CA
Epdm Rv Roof Repair Mira Loma, CA
Rv Roof Maintenance Mira Loma, CA
Rv Roof Repair Service Near Me Mira Loma, CA
Best Rv Roof Repair Mira Loma, CA
Repair Rv Roof Mira Loma, CA
Rubber Roof Installation Mira Loma, CA
Repair Rv Roof Mira Loma, CA
Rv Slide Out Roof Repair Mira Loma, CA
Rv Fiberglass Roof Repair Mira Loma, CA
Rv Fiberglass Roof Repair Mira Loma, CA
Repair Rv Roof Mira Loma, CA
Rv Trailer Rubber Roof Repair Mira Loma, CA
Rubber Roof For Camper Mira Loma, CA
Replace Rv Roof Mira Loma, CA
Repair Rv Roof Mira Loma, CA
Rv Roof Repair Fiberglass Mira Loma, CA
Rv Rubber Roof Replacement Cost Mira Loma, CA
Rv Trailer Rubber Roof Repair Mira Loma, CA
Resealing Rv Roof Mira Loma, CA
Resealing Rv Roof Mira Loma, CA
Rv Slide Out Roof Repair Mira Loma, CA
Finding A Seo Company Near Me Mira Loma, CA
Near Here Seo Expert Mira Loma, CA
OCRV Center
Table of Contents
- – Rv Trailer Rubber Roof Repair Mira Loma, CA
- – OCRV Center
- – Motorhome Roof Replacement Mira Loma, CA
- – Roof Repair For Rv Mira Loma, CA
- – Rv Roof Leak Repair Mira Loma, CA
- – Rv Roof Repair Service Near Me Mira Loma, CA
- – Rubber Roofing For Campers Mira Loma, CA
- – Rv Rubber Roof Repair Mira Loma, CA
- – Rubber Roof For Rv Mira Loma, CA
- – Rv Roof Leak Repair Mira Loma, CA
- – Epdm Rv Roof Repair Mira Loma, CA
- – Rubber Roof For Rv Mira Loma, CA
- – Resealing Rv Roof Mira Loma, CA
- – Class C Rv Roof Repair Mira Loma, CA
- – OCRV Center
Latest Posts
Santa Ana Key Man Insurance Quote
Health Plan Insurance Newport Beach
South Pasadena Swamp Cooler Pad Replacement
More
Latest Posts
Santa Ana Key Man Insurance Quote
Health Plan Insurance Newport Beach
South Pasadena Swamp Cooler Pad Replacement