All Categories
Featured
Table of Contents
- – Full Service Rv Repair Near Me West Covina, CA
- – OCRV Center
- – Rv Repairs Near Me West Covina, CA
- – Rv Repair Places Near Me West Covina, CA
- – Rv Repair Places Near Me West Covina, CA
- – Motorhome Repair Shop West Covina, CA
- – Rv Repair Service Near Me West Covina, CA
- – Motorhome Repair Shops West Covina, CA
- – Rv Delamination Repair Near Me West Covina, CA
- – Rv Service And Repair Near Me West Covina, CA
- – Rv Repairs Near Me West Covina, CA
- – Camper Ac Repair Near Me West Covina, CA
- – OCRV Center
Full Service Rv Repair Near Me West Covina, CA
Marvin Braun, proprietor of Accuracy motor home, is an RVIA/RVDA Master Licensed Recreational Vehicle Professional and a permanent RVer. He and his other half deal with and utilize solar energy every day. Marvin keeps up with the most current technology, consisting of crossbreed inverters and lithium battery systems. He installs systems on all classes of RVs consisting of recreational vehicle, 5th wheels, travel trailers, Airstreams and more.
Perform the finest quality handiwork possible. Offer consumer education and learning on care and maintenance of their new solar arrangement. Provide the best quality elements in the sector.
Before April of 2018, our only boondocking experience in the very first 20 months of traveling the country in our recreational vehicle, was 3 evenings at a state park in Rhode Island, and one evening at a vehicle stop car parking lot in Laramie Wyoming. The weekend invested in George Washington State Park near Divine Superintendence Rhode Island was spent outside, playing in a lake, enjoying the warm summer weather, and our only electric requirements were for the lights.
The heating system draws a great deal of power, and running all evening would kill any kind of solitary 12v battery in a matter of hours. That wasn't the moment we made a decision to obtain even more batteries or anything like that, it was simply our only experience with camping off grid for any kind of amount of time with our Cyclone.
Rv Repairs Near Me West Covina, CA
Windy Country appeared to have the market cornered on Amazon recreational vehicle Solar, so I chose them. To get the power out of the batteries, I included 2 standalone electrical outlets straight to the inverter, one in the cooking area for our Instantaneous Pot, and the other in a very easy area to gain access to for billing and whatever else we required it for.
Although the sun never embeds in Alaska, we definitely battled with the 3 panels on the roof covering given that it was cloudy and over cast the majority of the moment. Thankfully we might bill the batteries a few various means: Solar panels, when the sun happen to be out Alternator, when the motorhome's engine was keeping up the on board generator We traveled in the Summer season Residence from April 15th to August 25th and in those 4 months I certainly learned a great deal concerning powering a recreational vehicle solar off the grid.
Possibly an additional battery (and far better batteries), an additional panel or 2, and be much more mindful of the dimension and length of electrical wiring I used for the numerous connections throughout the system. On the whole it was a fantastic cheap service that functioned. The major takeaway from that experience was we did NOT desire to be reliant on 2 separated outlets; we desired our RV to function the very same whether it was connected in or otherwise.
This is a bunny opening like you have never ever seen! There are a lot of methods to skin this pet cat that my head was rotating. I was looking into panels, inverters, inverter/chargers, charge controllers, batteries, electrical wiring, breakers, battery monitors, etc. There is a riches of info out there, yet it was done in some international language that spoke in regards to watts, ohms, volts, amps, gauge electrical wiring, crossbreed, aid, bluetooth, Wi-Fi, and the listing goes on and on! We acquired a Kill-a-watt electrical power usage monitor, started measuring our energy intake and completed an energy Audit.
Rv Repair Places Near Me West Covina, CA
We have the ability very rapidly to make use of a great deal of electrical energy. When analyzing the process, and what we desired to achieve with the system, I kept believing back to our solar objective declaration from the Summertime Home, we desired our RV to function the very same whether it was plugged in or not! My please note: I am fantastic with DC electric systems, but know just enough regarding air conditioner systems to be harmful.
This blog is NOT suggested to be an absolute source for powering your RV, however even more to document our develop and journey to being power independent. I mentioned above, our 40' toy hauler fifth wheel came from the factory with a single 12 volt battery. We had changed it in the previous year, and honestly hadn't really utilized it for much because we were constantly connected in.
With that being stated, our 50 amp RV has 2 x 120-volt hotlines going right into the Motor home's primary Air conditioning distribution panel. It feeds 120 volts of AC to the crucial circuits of the RV.
Rv Repair Places Near Me West Covina, CA
Victron Multiplus Inverter/Charger A lot of the installs that I was complying with, all seemed to circle back to a couple of various producers, Magnum and Victron appeared to be blazing a trail. Several of my buddies were utilizing Victron parts with a great deal of success and full marks, so I picked their tools for the core of the system.
However we will certainly reach that later! Lucky for me, a friend of ours is a Victron Dealership, and I had the ability to get a bargain on the meat and potatoes of the system. 2 x Victron 12/3000/120 -50 Multiplus Inverter/Chargers These hold true sine wave inverter/chargers, and take the location of the existing converter battery charger currently in the RV.
Motorhome Repair Shop West Covina, CA
But area was a premium up there, and the inverters had specific air space requirements. The Generator has a sheet steel shadow dividing it from the remainder of the area, so I opted to cut that shroud down 6" to obtain the extra area I needed. I reduced around the shadow, dropped it down, and put pop rivets to hold it in location.
According to the Victron Manual, the inverters can be installed horizontally or up and down, so I opted to mount them horizontally on their sides on the wall surface. In doing this, I fulfilled all of the needed air voids. The original wall surface was only" fragment board, so to support the 70lbs that each of the inverters evaluate, I included a piece of" plywood throughout the back of the wall surface behind them.
Rv Repair Service Near Me West Covina, CA
Considering that we are speaking solar system, certainly we required solar panels. There are numerous different alternatives out there for solar panels; in the long run I selected to select Constant Resources for a few various reasons. Was the cost. These panels are $185 each shipped for 200 Watt Panels, and that is around as great a cost you will locate for that size panel, brand-new and shipped to your door (or in our situation Walgreens)! Next was reputation.
Among my buddies has one that was fractured throughout installment, and it still functioned well! Something I suched as regarding the certain panels I went with is that I could get the very same specs in a square or rectangular panel. Ultimately, I went with all rectangles, however had I intended to (or when I intend to) include more panels, I can get the various forms and make better use my roofing system area.
Motorhome Repair Shops West Covina, CA
We had not tilted when, and 1 collection of the tilting brackets cost greater than the full collection of the Z brackets. I went budget plan on the installing braces. A pal of mine that aided me install the majority of the system instructed me a great method to mount the panels.

We pierced pilot openings, placed dicor in the red, screwed them down and after that covered the base of the brace and surrounding roof with dicor. The eternabond tape gave it an included layer of water seal, and secured the rubber from being tore if the metal Z brace happened to wiggle or move in any way.
It is necessary to have a strategy in place for the electrical wiring. When you start handling cutting and kinking lugs onto the cables, it gets extremely pricey, and you do NOT wish to have to kink, cut, and crimp again. That will cost you $5 or more for each time you overestimate cable length and waste a wire lug.
Rv Delamination Repair Near Me West Covina, CA
Given that I was setting up 2 inverters and 2 fee controllers, it was essential to keep those 2 systems different. I used red and blue cord tags to recognize electrical wiring so I wouldn't get them confused. I likewise used the same red and blue stickers on the parts themselves to aid maintain things straight.
Get yourself a great set of cutters and a pole dancer for heavy gauge electrical wiring. Hydraulic crimping tool. I was lucky sufficient to have a close friend assisting me via the majority of the installment that had this crimping tool, and when he left, I struggled to discover a kinking tool to complete the project that didn't entail just beating the lugs with a hammer.
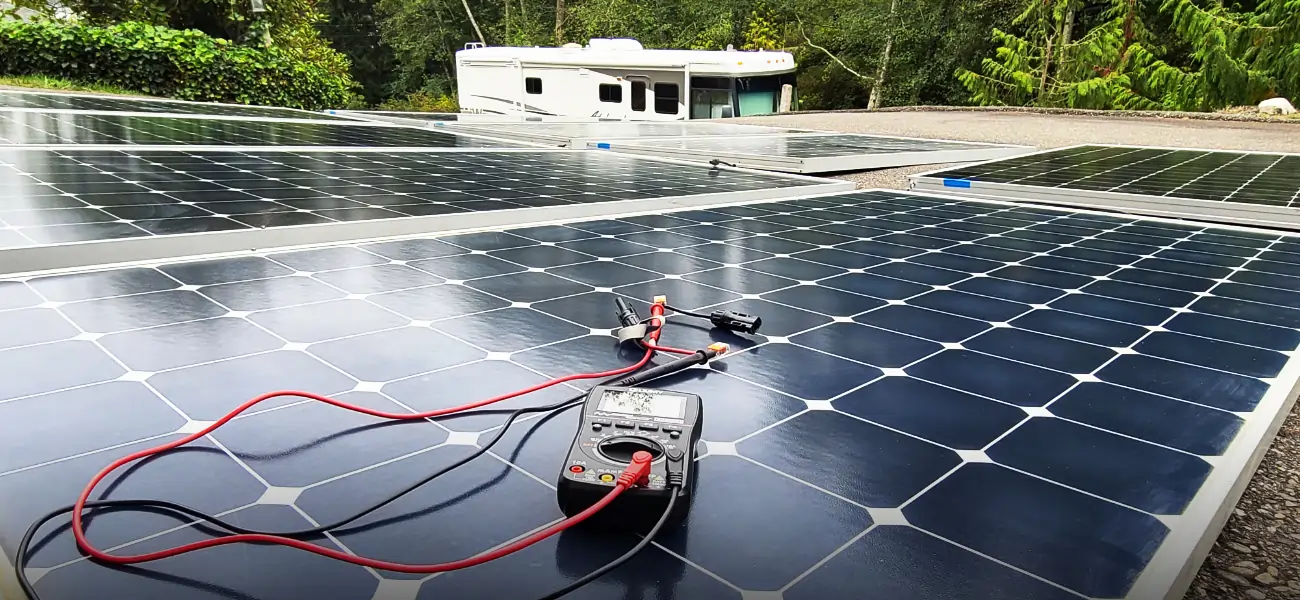
Spend the $50 on Amazon for the crimper. MC4 connector crimper/tool package was also fantastic to have. I got it off Amazon for much less than $30, and it made making my links between the panels a lot easier. Digital Multi Meter. It does not need to be very fancy, however the capacity to determine resistance/continuity and both AC and DC voltage is very important.
Rv Service And Repair Near Me West Covina, CA
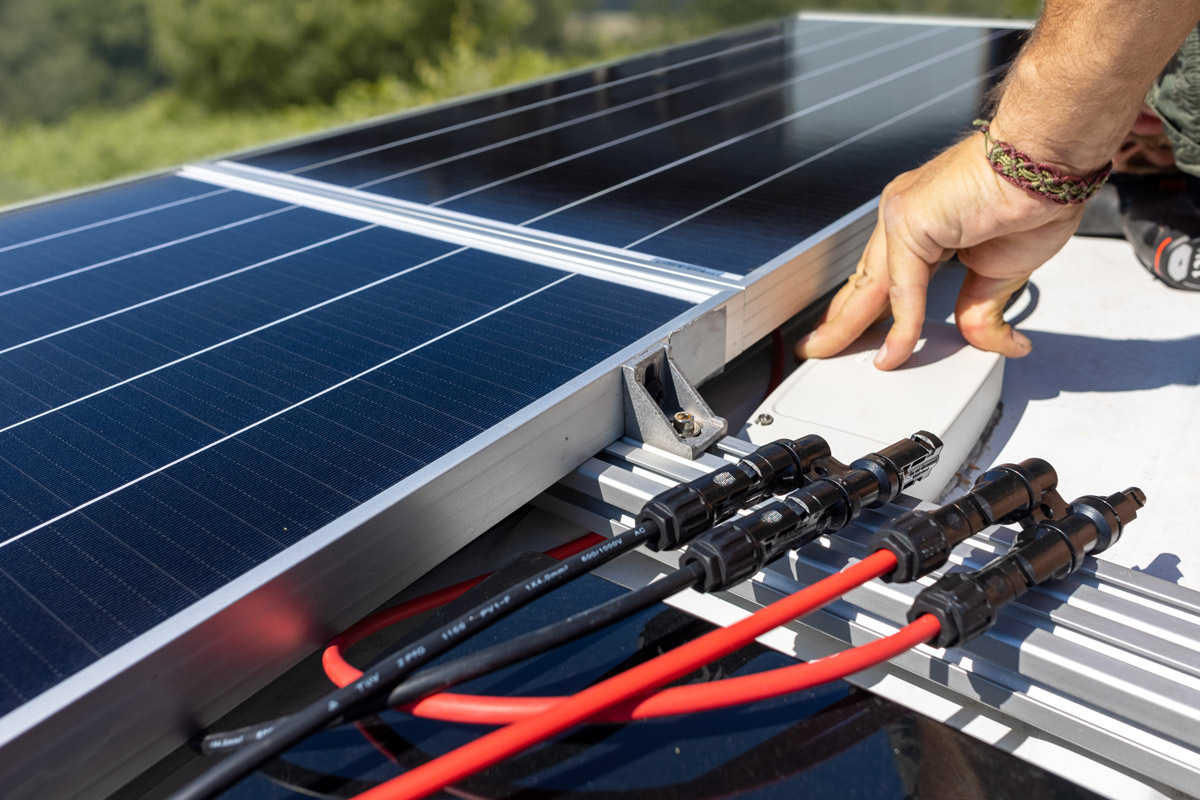
From Home Depot I got a water resistant electrical box about 8"x8"x6". I pierced 5 openings into the box: 4 x Small holes, one each for circuitry coming from the panels with weather evidence fits to maintain the aspects out 1" opening in the lower leading the cords via the roofing system into the walls of the RV Inside the box the 10 AWG wires from the panels were mated onto 6 AWG cords for its journey via the RV to the solar cost controllers Victron parts all function really well with each other and share info.
Along with every one of this circuitry, the Inverters and the Battery monitor came with voltage sense and temperature level sense wires that needed to be attached to the battery financial institution appropriately. Allow's start with the solar circuit. I am running 6 x 200 watt panels configured right into 2 x 3 panel legs wired in series.
Rv Repairs Near Me West Covina, CA
I discovered it much more cost effective to run 2 different smaller sized controllers than 1 larger controller efficient in taking care of the quantity of power originating from the panels. In enhancement, since the 2 strings are running independent of each other, if there is color or absence of angle to the sun on 1 of the 2 strings, it will not prevent the power manufacturing of the various other string.
Keep in mind; as soon as the panels remain in sunshine, they are producing power, so I utilized the circuit breakers in this placement to provide me the capacity to separate them entirely from the remainder of the system. From there the circuitry encounters the solar fee controllers in the front compartment near the battery financial institution.
Once more the point is to not only shield, yet to provide me an area to isolate the system if need be. The last leg of circuitry in the solar circuit goes from the breaker right into the favorable and adverse busbars that are directly linked into the battery financial institution. Let's maintain opting for the DC (12 volt) system.
Camper Ac Repair Near Me West Covina, CA
A DC system is more similar to the type of electric system located in an auto. The RV's 12 volt system has its own security and control in position, so I did not modify it any way; I merely powered it from the favorable and negative busbars from the battery financial institution.
OCRV Center
Address: 23281 La Palma Ave Yorba Linda, CA 92887Phone: (714) 909-1444
Email: art@ocrvcenter.com
OCRV Center
This component of the circuit can run extremely high amounts of electrical energy depending on what you are powering, so this needs significant security. From the Battery Financial institution, I ran huge 4/o electrical wiring right into a 400 amp fuse. This disastrous failure fuse is implied to shield the wiring in between the inverters and the battery financial institution.
Rv Ceiling Repair West Covina, CAMotorhome Service And Repair Near Me West Covina, CA
Rv Repair And Service Near Me West Covina, CA
Best Rv Repair Near Me West Covina, CA
Motorhome Refrigerator Repair West Covina, CA
Motorhome Service And Repair Near Me West Covina, CA
Rv Repair Service Near Me West Covina, CA
Full Service Rv Repair Near Me West Covina, CA
Motorhome Refrigerator Repair West Covina, CA
Motorhome Refrigerator Repair West Covina, CA
Rv Floor Repair Near Me West Covina, CA
Rv Refrigerator Repair Near Me West Covina, CA
Best Rv Repair Near Me West Covina, CA
Rv Repair Services Near Me West Covina, CA
Rv Refrigerator Repair Near Me West Covina, CA
Camper Ac Repair Near Me West Covina, CA
Full Service Rv Repair Near Me West Covina, CA
Rv Repairs Near Me West Covina, CA
Rv Repair Services Near Me West Covina, CA
Rv Repair Centers Near Me West Covina, CA
Rv Floor Repair Near Me West Covina, CA
Motorhome Refrigerator Repair West Covina, CA
Motorhome Repair Service West Covina, CA
Rv Repair Places Near Me West Covina, CA
Rv Repair In My Area West Covina, CA
Rv Service And Repair Near Me West Covina, CA
Rv Repair Places Near Me West Covina, CA
Motorhome Refrigerator Repair West Covina, CA
Full Service Rv Repair Near Me West Covina, CA
Rv Repair Service Near Me West Covina, CA
Rv Service Repair Near Me West Covina, CA
Motorhome Service And Repair Near Me West Covina, CA
Motorhome Generator Repair Near Me West Covina, CA
Rv Repair Services Near Me West Covina, CA
Motorhome Repair Service West Covina, CA
Motorhome Refrigerator Repair West Covina, CA
Rv Solar Panel Installation West Covina, CA
Rv Repair In My Area West Covina, CA
Rv Repair In My Area West Covina, CA
Rv Floor Repair Near Me West Covina, CA
Rv Plumbing Repair Near Me West Covina, CA
Full Service Rv Repair Near Me West Covina, CA
Rv Repair Places Near Me West Covina, CA
Full Service Rv Repair Near Me West Covina, CA
Rv Repair In My Area West Covina, CA
Rv Refrigerator Repair Near Me West Covina, CA
Rv Repair Centers Near Me West Covina, CA
Camper Ac Repair Near Me West Covina, CA
Motorhome Repair Shops West Covina, CA
Rv Service And Repair Near Me West Covina, CA
Rv Service Repair Near Me West Covina, CA
Rv Floor Repair Near Me West Covina, CA
Full Service Rv Repair Near Me West Covina, CA
Motorhome Generator Repair Near Me West Covina, CA
Rv Delamination Repair Near Me West Covina, CA
Rv Refrigerator Repair Near Me West Covina, CA
Full Service Rv Repair Near Me West Covina, CA
Rv Service And Repair Near Me West Covina, CA
Rv Repair In My Area West Covina, CA
Motorhome Refrigerator Repair West Covina, CA
Rv Repair Services Near Me West Covina, CA
Rv Repair Places Near Me West Covina, CA
Rv Generator Repair West Covina, CA
Rv Ceiling Repair West Covina, CA
Full Service Rv Repair Near Me West Covina, CA
Rv Generator Repair West Covina, CA
Rv Repair Shops Near My Location West Covina, CA
Rv Plumbing Repair Near Me West Covina, CA
Rv Repair Service Near Me West Covina, CA
Rv Service Repair Near Me West Covina, CA
Motorhome Repair Near Me West Covina, CA
Rv Repair Centers Near Me West Covina, CA
Rv Mechanics Near Me West Covina, CA
Rv Repairs Near Me West Covina, CA
Rv Repair Shops Near My Location West Covina, CA
Rv Repair Places Near Me West Covina, CA
Motorhome Refrigerator Repair West Covina, CA
Camper Ac Repair Near Me West Covina, CA
Best Seo Expert West Covina, CA
Near Me Seo Pricing West Covina, CA
Rv Repair Places Near Me West Covina, CA
OCRV Center
Table of Contents
- – Full Service Rv Repair Near Me West Covina, CA
- – OCRV Center
- – Rv Repairs Near Me West Covina, CA
- – Rv Repair Places Near Me West Covina, CA
- – Rv Repair Places Near Me West Covina, CA
- – Motorhome Repair Shop West Covina, CA
- – Rv Repair Service Near Me West Covina, CA
- – Motorhome Repair Shops West Covina, CA
- – Rv Delamination Repair Near Me West Covina, CA
- – Rv Service And Repair Near Me West Covina, CA
- – Rv Repairs Near Me West Covina, CA
- – Camper Ac Repair Near Me West Covina, CA
- – OCRV Center
Latest Posts
Rv Rubber Roof Replacement Rowland Heights
Rv Carpet Installation Orange
Rv Refrigeration Repair Montclair
More
Latest Posts
Rv Rubber Roof Replacement Rowland Heights
Rv Carpet Installation Orange
Rv Refrigeration Repair Montclair